Jump to content
Lowepost
    Master Study in DaVinci Resolve Printer Lights

Master Study in DaVinci Resolve Printer Lights

xap3.139.235.100


Printer points were mechanical adjustments that affected the color balance and brightness of film before the digital age, and the technical process was done by a color timer. The systems used a series of dichroic filters that split the light into red, green, and blue, and each color then passed through 'light valves'. These were metal vanes that opened and closed in precise increments to allow the exact amount of light through to replicate the exact value for each light point. The three colors were then recombined back into full spectrum light and output to the film.

Mike Chewey at MGM labs developed the FCC system, which is the system still in use today.

- Dan Muscarella -

In digital grading, printer points are still very popular and common corrections for setting the primary balance, but also for creating looks. One of the reasons for its popularity is that printer points move the signal in its entirety and alter the entire tonal range in the image. This way, we stay true to the way the original image was shot, and the result can be very clean and cinematic.

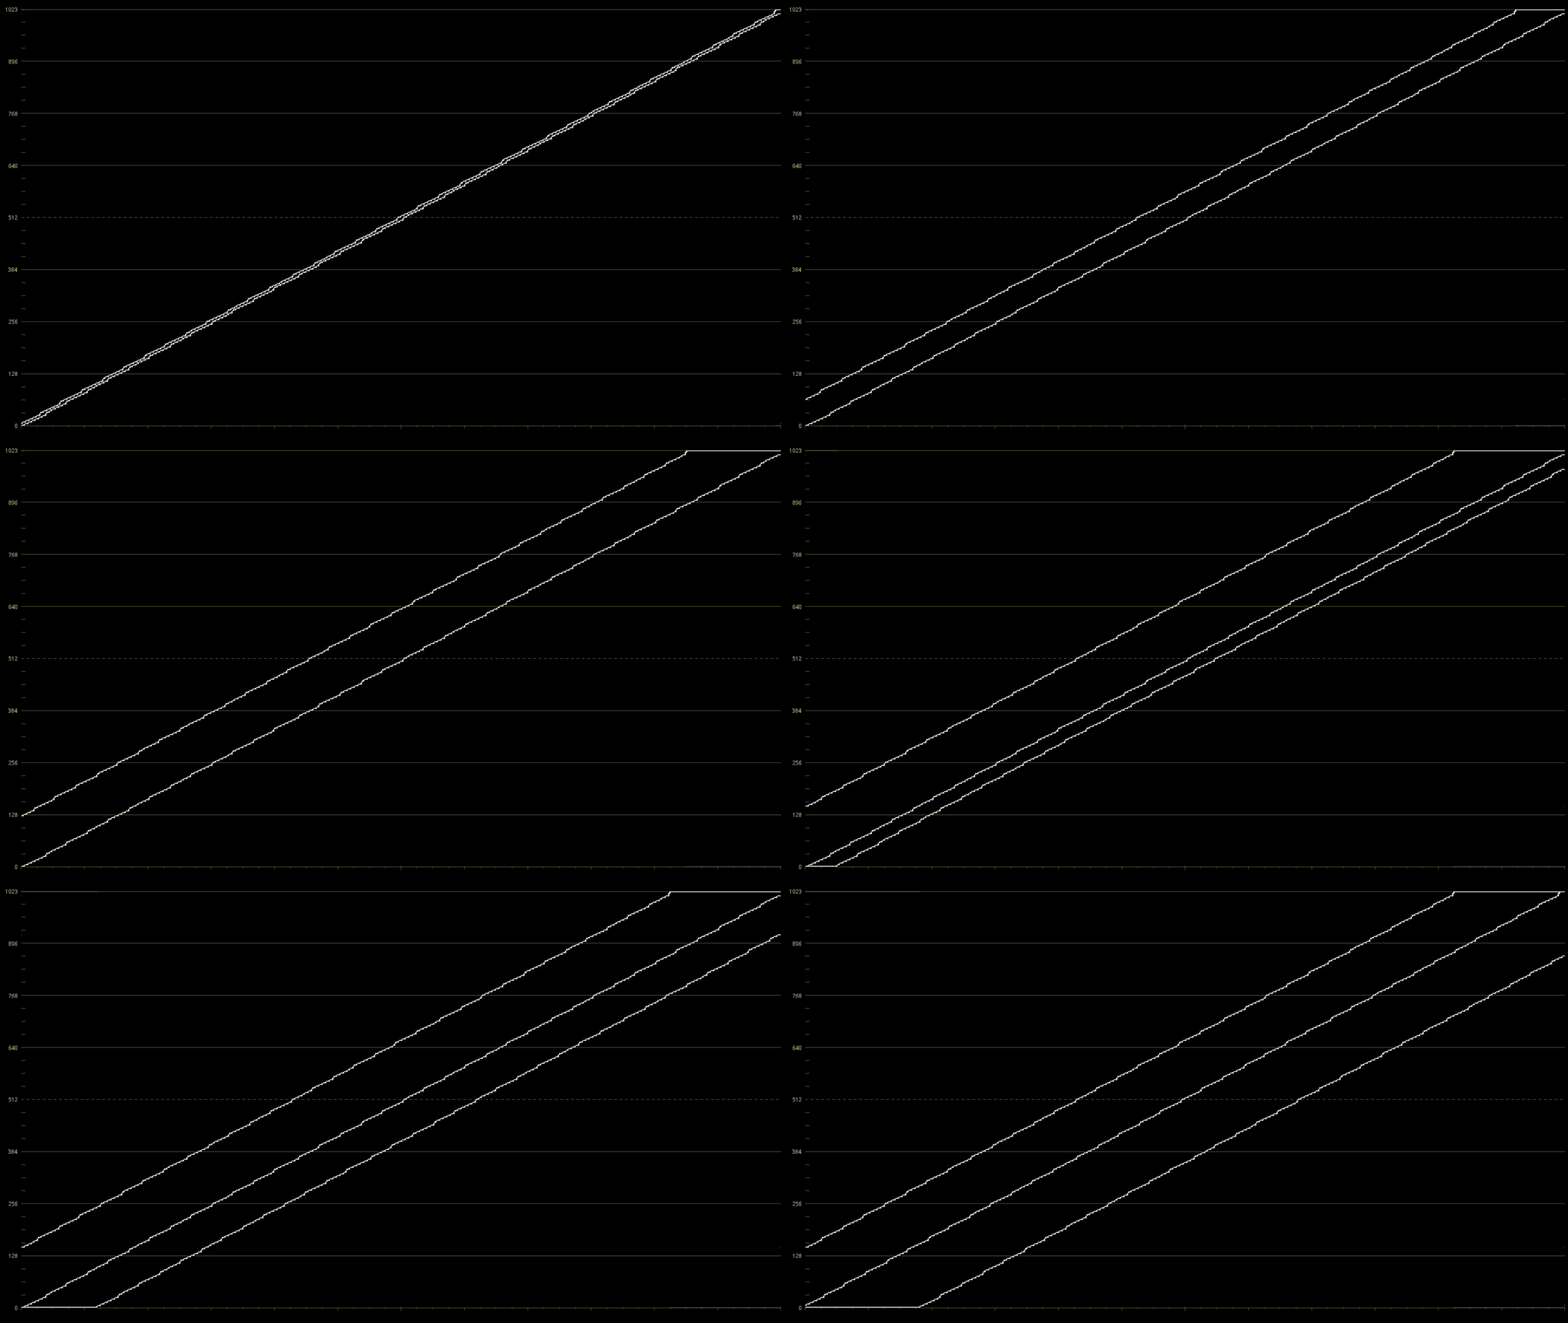
To illustrate this we can look at the waveform when we add red and subtract green to a grey-scale image. The relationship between the shadows, midtones and highlights stays consistent, and the contrast never changes.

waveform_printerlight_photoshop.gif

By using controls that separate tonal ranges such as lift, gamma and gain, we betray the natural relationship between the shadows, midtones and highlights. This is illustrated with a gain adjustment in the example below.
 

Get access

This was a short excerpt, become a premium member to access the full article.

Become a Premium Member


  • Like 30
  • Thanks 9

User Feedback

Recommended Comments


Agree! 

Altought I was hoping to get a little deeper insight, but I hope some more things can come up in the comments. 

For example I was reading in some other article (can't find it right now, I will look for it) the use of printer lights also to control with precision different tonal range like shadows, mids, hilights. 

How that can be achieve? 

By keying the 3 tonal ranges and keep them in parallel, perhaps? 

It's quite long time im using printer points for my base grade, and I have to say it's the best tool as far I'm concern 


Link to comment
Share on other sites

I find this article above excellent, and I have never seen a more in-depth and correct presentation of the use of printer points.

The techniques explained here is best practice in the high-end facilites and I like the fact that it a long way contradicts the way I have seen printer points being demonstrated in other learning resources online where the corrections and balancing are done without being watched through a curve.

Controlling the separate tonal ranges with printer lights would work against what the tool is designed for and the point of creating a clean and cinematic image that preserves the lightning on set.

Link to comment
Share on other sites

8 hours ago, Amada Daro said:

Controlling the separate tonal ranges with printer lights would work against what the tool is designed for and the point of creating a clean and cinematic image that preserves the lightning on set.

Your comment on "the hobbit" thread helped me find the article I was referring to 😊

In that article it clearly state that printer point are used to control highlight and shadows. 

I was wandering what it meant and how was that achieved. 

Link to comment
Share on other sites

20 minutes ago, Orash Rahnema said:

In that article it clearly state that printer point are used to control highlight and shadows. 

I was wandering what it meant and how was that achieved. 

Not sure about this, but I think she ment  'keep to 1/4 trims in RGB highlights, MIDTONES and shadows' 

Correct me if someone is more familiar to the Mistika toolset and think otherwise. 


Link to comment
Share on other sites

Let's be REALLY explicit here.  "Printer Points" (and Offset, which is the same thing) are just a very simple mathematical Add or Subtract to the underlying color numbers, unlike the relatively more mathematically complex Contrast, Lift, Gamma or Gain.  As such, they are intended as an "Overall" correction, and a very powerful one.  As the article points out, it works in its original intended fashion only with Log footage, specifically Cineon Log (Red Log Film is almost the same thing), which was a Gamma curve formulated by Kodak as the digital equivalent of film.  There was no tonal range control with film, thus PPs are intended to adjust the entire image. That said, some colorists DO use printer points within tonal "keys" (darks, mids, lights) to get better control over those ranges in today's digital environment.

  • Like 5
Link to comment
Share on other sites

19 hours ago, Orash Rahnema said:

Agree! 

Altought I was hoping to get a little deeper insight, but I hope some more things can come up in the comments. 

For example I was reading in some other article (can't find it right now, I will look for it) the use of printer lights also to control with precision different tonal range like shadows, mids, hilights. 

How that can be achieve? 

By keying the 3 tonal ranges and keep them in parallel, perhaps? 

It's quite long time im using printer points for my base grade, and I have to say it's the best tool as far I'm concern 


Mistika has keyboard shortcuts for RGB Gain, Lift and Gain+Lift (offset)

Link to comment
Share on other sites

Hi there

Thanks a lot for that article 🙏

in mistika the printer lights tools

can be break or gang for black point

and White point. Meening that if you break the gang. You can substract or add to either blacks or white. 

You can use it as contrast as well

if you -1 for black  and +1 for white. 

Hope it helps Yoav. 4EB44C85-AFDC-4CB7-87C5-40BC6C9052B3.thumb.jpeg.afdc089649461cd5df310db11fa8febb.jpeg

  • Like 3
Link to comment
Share on other sites


Join the conversation

You can post now and register later. If you have an account, sign in now to post with your account.
Note: Your post will require moderator approval before it will be visible.

Guest
Add a comment...

×   Pasted as rich text.   Paste as plain text instead

  Only 75 emoji are allowed.

×   Your link has been automatically embedded.   Display as a link instead

×   Your previous content has been restored.   Clear editor

×   You cannot paste images directly. Upload or insert images from URL.

×
×
  • Create New...