Lowepost
Administrators-
Posts
765 -
Joined
-
Last visited
Reputation
968 ExcellentAbout Lowepost
- Birthday 04/05/2017
Recent Profile Visitors
8,874 profile views
-
Thanks for your kind words Julien! You do not have to bring your PFE LUT into a color managed environment to make the reference. Simply add the LUT to a Grey Scale with no color transforms applied at all, and the result you see on the Waveform will be what you want to recreate. Save a still so that you have a reference. Then you'll have to set up your color managed workflow with the transform curve you want, and project it onto the Waveform. From there on you can use your reference still and the curve operator to make an "offset" that basically will be the difference between your reference and the color managed display curve.
-
Thanks Ryan!
-
The ultimate guide to color grading monitors
Lowepost commented on Lowepost's insider article in Color Grading
The DM220 (HD) is FSI's new 22” OLED, the DM 240 is no longer in production. Mixed feedback on the Eizos. -
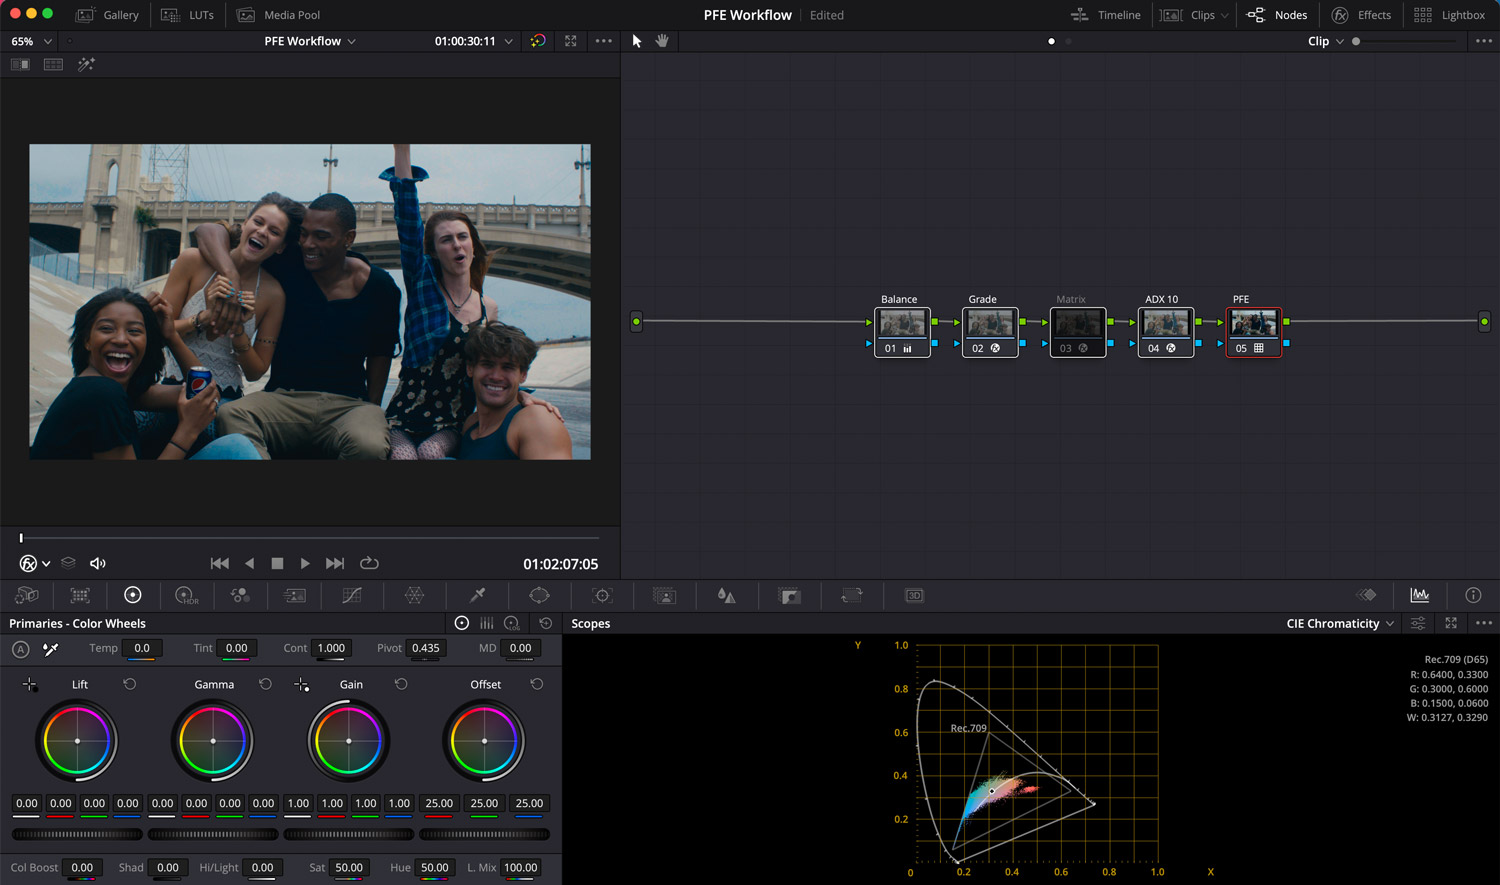
Print film emulation workflows are popular among colorists, and the idea is to create a film look by treating the image as if it was printed onto a specific film stock. This used to be a straight forward process, but new modern workflows have added some complexities that will be discussed in this post. Unfortunately, there are not much real print film emulation data publicly available, and it’s often protected by the owners and facilities. It’s part of their secret sauce. However, colorists can access print film emulations through a handful of standalone applications and plugins with added color management options, or as PFE LUTs. PFE LUTs Most colorists are well acquainted with the PFE LUTs available within DaVinci Resolve. They are based on ICC film emulations provided by Adobe, and cover a range of emulations from both Kodak and Fuji with different white points. The Kharma LUTs have implemented print film data from Kodak color scientist Mitch Bogdanowicz, Fotokem, Light Illusion and the ARRI Scanner. A set of Mitch's Kodak 2383 LUTs are also available for free in Ravengrades Look Development Starterkit. In addition to being a part of Kharma, Light Illusion have their own set of PFE LUTs and have implemented their data into the Koji LUTs. There are also some old Lustre PFE LUTs floating around online. PFE LUT Workflow There are several ways to set up a PFE LUT Workflow in DaVinci Resolve, and in the following example we use a combination of some custom color manipulations, a 3x3 Matrix and one of Resolves built-in Film LUTs. The footage is shot on ARRI and can be downloaded here. 1. Apply PFE LUT Start by adding the PFE LUT at the end of your node structure. 2. ADX 10 Transform The PFE LUT is designed to expect a film negative with a Cineon tone curve. The traditional method was to apply a Color Space Transform going from ARRI LogC3 to Rec709 Color Space and Cineon Film Log Gamma, but today we have a better method. By using the ACES Transform (without the need of working in ACES) to go from ARRI LogC3 to the Academy’s ADX 10 color space, we get a more accurate transform to an encoding similar to Kodaks Cineon Log. Besides, we’ll leave the display transform to be handled by the PFE LUT at the end. Just remember to apply a gamut compression as shown on the image below to ensure that out-of-gamut values coming into the ADX 10 color space will not be clipped. 3. 3X3 Matrix The traditional method of transforming from Log3 to Cineon with the Color Space Transform instead of using ADX 10, was often combined with the use of a 3x3 Matrix. A 3x3 Matrix is a data set provided by ARRI, and it's supposed to help bringing the hue values of the ARRI footage even closer to negative film scanned on the ARRI film scanner. By bringing them more in line with the hues of the “film scan”, the PFE LUT would perform better and more accurately achieve its intended response. A 3x3 Matrix is designed to be watched through a PFE LUT and is typically applied through a DCTL. Both of the color checkers below is shot with tungsten light and have a PFE LUT applied, and the 3x3 Matrix is applied to the one on the right side. Our observation though, is that the ADX 10 transform has incorporated the shifts and attributes that would come from the Matrix, such as irregular distribution of saturation and denser colors. This makes the use of Matrix redundant. Also note that the Matrix is originally designed for ARRI footage, but the ACES Transform change the data based on your camera. If you prefer using the 3x3 Matrix, it can be downloaded in the Look Development Starterkit. Another alternative is to manually insert the numbers from ARRI’s Whitepaper into Resolve’s RGB mixer. If you do so, make sure to untick the “preserve luminance” button. In Baselight, the numbers can be inserted in the CrossTalk operator for the same result. Note that a 3x3 Matrix created manually in for example Nuke will be more accurate as it allows 8 decimals, while the RGB mixer is restricted to 2 only. In the same Kit you'll also find a Matrix Removal that can be used to subtract the 3x3 Matrix from a LUT. This can be useful if you want to remove the 3x3 Matrix from an existing PFE LUT to built your own. 4. Exposure and balance Now it’s time to adjust the exposure and balance to get rid of any unwanted color cast and compensate for any exposure issues. This is important because we want a neutral starting point and good color separation for our film look. We use the offset controls as it moves the entire signal in its entirety and provides a clean result. Read more about exposure and balancing techniques in our printer lights master study. 4. Grade Lastly, it's time for some custom color adjustments. In this example we use GradeLab by Ravengrade that have implemented subtractive color controls for more film style look adjustments. Any color controls can be used, but many colorists prefer to use global controls such as printer lights (or CMY controls in GradeLab) in a film workflow. Global controls move the signal in its entirety, and avoid breaking the relationship between the different parts of the film curve in the PFE LUT. Not all PFE LUTs require Cineon Log, a 3x3 Matrix and Color Space Transforms (or ADX 10) even though Resolves built-in Film LUTs and others such as Mitch Bogdanowicz’s Kodak 2383 PFE do. The Kharma LUTs have all these elements built in, as well as preserved middle gray values so that they match the original exposure of the specific camera footage they will be used on. Information about how the LUTs are designed and what they require is often described in the metadata of the LUTs. A tip is to drag and drop the PFE LUT into an online HTML editor (or open in a desktop editor) as the most important information often is listed in the metadata. PFE LUTs are not for modern workflows This film workflow example above works perfectly fine for some projects, but most of the PFE LUTs are restricted to a Rec709 target. Another issue is that they all have built-in tone mapping (the contrast curve part). This means they can not be used in a color management workflow such as ACES and RCM, or in any other node based workflow with user-applied display rendering transforms. In addition, they can not be used inside of new cameras such as the Alexa 35, as they require the look files to be separated from the cameras built-in transforms. Inverting the display transform So to use the PFE LUTs in a modern workflow you'll have to find a way to extend it to a wider range than Rec709 and also decouple the print characteristics of the PFE LUT from the tone mapping. One way to decouple the print characteristics from the tone mapping that is often seen online, is to invert the tone mapping by using an exact Inverse curve - sometimes referred to as "making the butterfly". The idea is to invert the existing tone curve to a straight line, so that you’ll be left with only the print characteristics. The problem with this approach and why you don't want to work this way, is that a LUT on top of the LUT application will introduce quantization issues and rounding errors because the low precision of a cube. You will most likely not find a one hundred percent exact Inverse LUT of your PFE LUT either, and if the negative and positive values of the two curves doesn't match the inversing will not be accurate. An approach that works better, is to follow these steps. 1. Isolate the color Add a layer mixer with the PFE LUT applied to the bottom node, and set the composite mode to Color. This will isolate the colors from the LUT. 2. Isolate the tone curve Use the same setup, but set the composite mode to Luminosity. This will isolate the tone curve. Now that you have successfully isolated the two components, you can combine them back into a parallel node to get the exact same result as the original PFE LUT, but with individual control of each component. A third approach is to use external applications such as Lattice or ColourSpace from LightIllusion. They have automated the extraction process, so that you can subtract the two components from the PFE LUT automatically with a single click. Rebuilding with curves The isolation process above works great if your display target is Rec709, but if you want to use it for P3 or PQ HDR you'll need to rebuild the curves of the PFE LUT to extend their range. Rebuilding curves is best done using a curve operator, as they typically work in 32bit float and return great resolution. We recommend rebuilding the curves in for example NUKE as the precision of the curve operators in Resolve and Baselight is awful. Because most of you have access to Resolve we'll walk you through it, but be prepared for a very tedious process as it's a precision game to get the points in the curves to match exactly. 1. The PFE LUT on the Waveform Start by applying for example Resolve's built-in Kodak 2383 PFE LUT to a grayscale ramp to visualize the curves on the Waveform. You can expand the Waveform view for greater details, and analyze the curves to get a better overview of what will be required to rebuild them. We can clearly see that the reds and greens are lifted higher than the blues, resulting in significantly warmer highlights than the D65 whitepoint which is standard for Rec709. The shadows never reached true black, and the curves are steeper than a traditional technical LUT provided by camera manufacturers which means there are more contrast in the mid tones. Notice that the curves cross at the 60 IRE mark, and that they overlap several places. It's telling us that we should separate them, before rebuilding them. Before you move on to the rebuilding process, make sure to set the "3D lookup table interpolation" to "tetrahedral" in the color management settings. It interpolates the values between the data points more accurate than the standard "trilinear" option, and is therefore a better starting point for re-building curves. When this is done, save a still to the gallery. 2. Tone Curve As we have seen, some of the curves overlap and it will be easier to rebuild them individually. Go to the Waveform settings and choose “Y” to see the tone curve only. 3. Split the screen Now, disable the node and play the still you have saved with the wipe set to "vertical. This way, the Waveform will show both the tone curve from the PFE LUT and a straight line that you can modify to match. 4. Tweak to match Tweak the custom curve to match. By enabling editable splines (click the three dots), you can get really close by just using two points. Then finesse with single points. 5. RGB curves on the Waveform When done, disable the "contrast node" and add a new one labeled "color". Go back to the Waveform settings and swap the "Y" with the "RGB" channels to enable one of the individual color curves, for example the red. 6. Tweak to match Tweak the red curve to match, but before you do - make sure Lum Mix in the color wheel tab is set to "zero" so that the curve adjustment of each individual color channel does not affect each other. When all the Y and RGB curves are matched, the tone mapping is separated from the print characteristics, and rebuilt to high-resolution versions. The Y and RGB components can now be used with different display transforms or to perform operations like inverting, scaling and mixing. Rebuilding for display-referred There is nothing wrong with using the rebuilt RGB curve components with a different tone curve than the one we just created. The resolution is now high enough to be used in a color managed workflow such as ACES or RCM or in a YRGB workflow using Color Space Transforms. But, by swapping out the Y component from the PFE LUT with for example the tone curve defined by ACES or RCM you'll get a different result than you are used to from PFE LUT alone. That's why we recommend a slightly different strategy when rebuilding the curves of the PFE LUT for use in a display-referred workflow. Instead of building the Y+RGB curves from a straight line as in the example above, simply start the building process from the color managed tone curve you plan to grade under and tweak this curve to match the curves of the PFE LUT. This delta component can now be saved and combined with other tone curves in the color managed workflow. In Ravengrades Look Development Starterkit, you can download a Shape component that is created this way. It's wrapped into a cube so that you can easily apply it as a LUT inside of Resolve. It's print characteristics derived by a Kodak 5219 print emulation processed at Fotokem, created under a DRT in Baselight by John Daro at Warner Bros. There is also a Tone Map component from the same emulation in the download folder. You can get a good idea of how it all works in a color managed workflow by importing the two components into separate nodes and watching the result from a gray scale on the Waveform. If you prefer to work in YRGB, you can add a third component (AWG to Rec709/P3 or 1000nits transform) from the same folder at the end of the node stack and get access to the complete emulation. Not an exact match Even though it is possible to rebuild the curves and adapt them to work in color managed workflow workflow, it might not be worth the time. Unfortunately, there is absolutely no way to adapt the PFE LUTs without abandoning some of the print characteristics. Rebuilding the curves without considering the other attributes of a LUT will result in a strange and inaccurate film look. First of all, by decoupling the print characteristics from the original tone mapping you are left with two separate components that no longer are working in conjunction with each other the same way as they do in the original version. The truth is that these two components are designed to react on each other when being altered, and by separating them this relationship will be broken. Secondly, when swapping between different display target the relationship between the two components will change even more. Just as important are the other non-linear and non-additive aspects of the PFE LUTs that simply is impossible to recreate with curves only. One example is channel cross coupling that varies with exposure, and the non-predictive response of changes in channel color that also varies based on the film stock. Some say that these aspects are the secret sauce of the film look, and trying to recreate it 100% will be like trying to un-bake a cake with mixed ingredients. The bottom line is that you will only be able to extract the key essence of the original version, so to access the exact texture and behaviour of real PFE LUTs, you’ll have to use them as is and embrace their limitations instead of forcing them to fit into a modern workflow. Print film emulations in apps and plugins Colorists have a love and hate relationship with the original PFE LUTs because of the mix of beauty, texture, kinks and imperfections they add to the image. Because of their limitations and that using them requires some know-how from the user, there are some color management systems and plugins available that makes it easier to use them. One of the most complete standalone apps is ColourSpace CMS by Light Illusion. It supports color manage workflows and allows the user to create and alter FPE LUTs from Kodak Vision 2383, Premier 2393, and Fuji Super F-CP 3510 film profiles. Another one is Ravengrade’s Cinelook Plugin for DaVinci Resolve, which includes some looks based on Mitch Bogdanowicz’s PFE data as well as from Fotokem and the ARRI scanner. It handles the color space transforms and adapts the looks to work properly on any camera footage and display target within the plugin. Filmlight offer Truelight film profiles which is manually cleaned generic print emulations built into their Baselight color grading system, and After Effects have implemented print data in some of their tools from Adobes own ICCs. There are other apps and plugins available, but watch out as many of them are "created by hand" and lack the components that makes the real emulations unique. Whenever possible, if emulating film stock, having actual data promotes a strong starting point but I always try to leave room for growth or manipulation incase the creative’s memory or experience of what a film stock looks like is different than the data. - Matthew Tomlinson, Harbor Picture Company It’s worth mentioning that there’s no such thing as completely accurate print film emulation. The film measuring systems vary, the film itself is a variable, and the creation process requires a number of subjective judgements. That said, absolute accuracy is normally not required either, as print film emulations is normally used as a starting point for a grade or as a special sauce ingredient of the final look. Modular print film emulations As color managed workflows are getting more popular and colorists will be required to deliver their grades for multiple display targets, print film emulations and other film style responses will continue to exist as modular components decoupled from the display transform. High resolution components give full flexibility and colorists can take for example the shadow response from one emulations and mix it together with the hue, saturation or highlight response of another film emulation. The components can be saved in libraries, every parameter can be adjusted and they will work for all display transforms. However, as long as some of the unique and beloved attributes of the original PFE LUTs can't be fully recreated, it will most likely continue to exist for years to come. Lowepost Thanks to Eric Weidt, John Daro and Matt Tomlinson for contributing to this post.
-
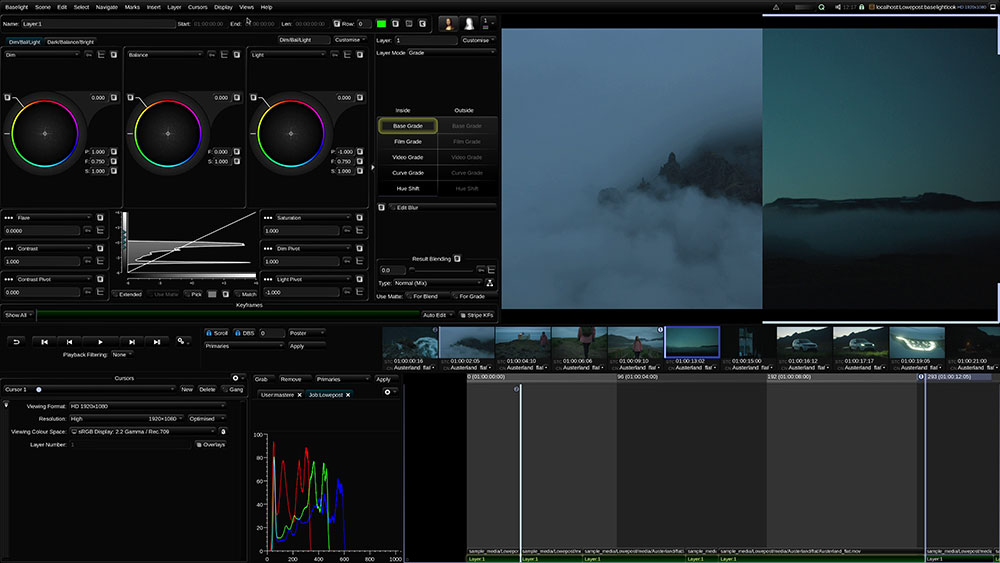
if you're interested in checking out Baselight, our instructor @Josh Petok has created a 20 minute long quick-start video for the free Baselight Look that includes everything you need to know for setting up a project, importing media, doing a simple grade and exporting a file.
-
There is a lack of Baselight knowledge in the industry at the moment, and learning Baselight has generally been challenging because most of the systems are only available at the high-end post production facilities. Fortunately, Filmlight have released Baselight Look which is a free Mac-only "student version" that includes the same interface, color science and features as the full Baselight system. However, as Baselight Look primarily is a learning tool there are some restrictions. Rendering is limited to 8-bit H.264 files only. Projects created in Baselight Look can not be imported into a full Baselight system or into Baselight Editions (and vice-versa). Some color panels are not supported. Get started quickly Getting started with Baselight can be time consuming, and requires new users to go through hours of online tutorials. We know some just want to download the software and quickly get in there to see what it's all about. That's why we have challenged our Baselight instructor @Josh Petok to create one single 20 minute long video that includes everything you need to know for setting up a project, importing media, doing a simple grade and exporting a file.
-
We have watched the available training before creating this introduction-course, and we'll cover the whole range from beginner to intermediate and more advanced.
-
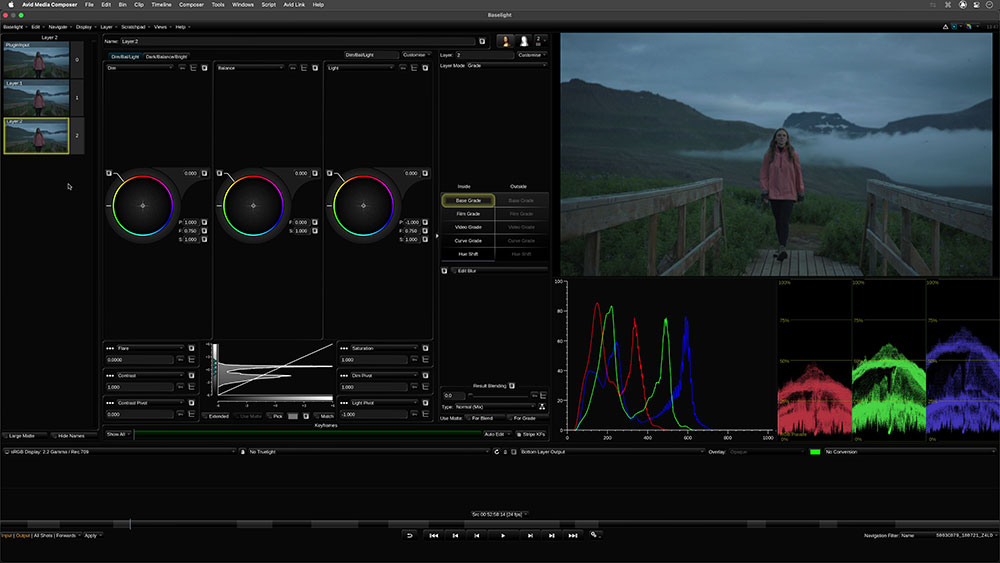
New training! Josh Petok has created an amazing training series for Baselight Editions inside of Avid Media composer. It's an introduction course, tailored for DaVinci Resolve colorists and Avid editors that want to get access to premium color grading tools. Learning different color correctors can lead to a a deeper understanding of color grading and help to see your current workflows, techniques and methods in a new light. Watch it here
-
Yes!
-
The Introduction to Baselight Edition for Avid course is created by Josh Petok, which has graded more than 700 TV episodes on Baselight. The Baselight Edition is used to grade popular TV-shows like Masterchef, The Voice, Lego Masters, Below Deck, The Biggest Loser, Fear Factor, and many other large scale and complex multi-camera productions all over the world. It's basically a full Baselight system wrapped into a plugin for a very affordable price. It's widely used in TV work because it eliminates all conform issues from going back and forth between the editing and grading application because everything happens inside of Avid. It also saves tons of storage because you never have to render anything out of Baselight. The last years many commercial colorists have switched to the Baselight Edition because of its excellent color science and affordable price. This course is tailored for colorists who want to switch from DaVinci Resolve to Baselight and Avid editors that want access to premium color grading tools. The footage used in this course is available for download, and Avid + Baselight Edition is available as free trials. Download footage About the instructor Josh Petok is a senior colorist working at Endemol Shine in Hollywood on a Baselight system. The majority of his color grading experience is in television and streaming for studios like Disney+, Fox, NBC, CBS and VH1, and includes over 700 completed episodes. Many of the industry leading directors, producers and cinematographers trust Josh to deliver the best looking images under the tightest deadlines. Who is this course designed for? Colorists DaVinci Resolve users Avid editors that want to get into color grading Lessons overview Introduction Project setup and color management The interface The Layers, Operators and Parameters Organization and Looks Avid workflow and export Software required Avid and Baselight Editions (Free trials available)
-
The last years, there’s been an increased focus on involving the colorist in pre-production with the other departments so that there’s alignment on the color design of the production. It’s unlikely that the colorist get to affect the choices made by the art- and wardrobe department directly, but it will be immensely useful for the departments to see how their costumes, make-up and lighting design looks like through the camera lens with the final look of the film applied. It can drastically alter how everything appears on the screen. The colorist can contribute to this by pre-designing a look together with the director and cinematographer, save it as a Show LUT look file and apply it to the camera so that all the set elements can be watched on the monitor with the “correct” color rendering. It ensures that better decisions can be made earlier, and that everyone involved in production are moving in the same direction. Imagine if the production want to go for a world war look and the final movie is ment to get a bleach bypass treatment. All the set elements will drastically change its appearance with the increased contrast and desaturated silvery look. This doesn’t mean the look used in the pre-tests is the final one. It’s an iterative process, and often you’ll have to test and tweek to know where you need to be before the production ready look is created. The same Show LUT look-file can be used in the entire production pipeline if it´s made properly. The editorial process will be more efficient as the dailies are more in line with the directors creative vision, and the client will see an image that is closer to ready. it will help visual effects to understand the tone and feel of the movie, and it can be a great starting point for the color grading and finishing work. Modern Show LUT workflow A traditional Show LUT had to be designed to do a color space transform for one particular camera color space to the desired viewing color space. For example from ARRI Alexa Mini (Arri Log C3) or RED (Red Wide Gamut RGB/Log3G10) to Rec709 Gamma 2.4. This way of creating Show LUTs is being depricated in modern workflows because of serveral reasons. First of all, it’s limiting to work with a Show LUT on set that is restricted to Rec709 primaries if you are required to grade in P3, deliver HDR or send an sRGB version of the LUT to the VFX vendor. There is also an increasing demand for monitoring HDR on-set. Another reasons is that some of the new professional cameras such as Alexa 35 do no longer support the traditional Show LUTs with baked-in technical transforms. They require log-to-log look files where the color space transform is handled in-camera. This means that modern Show LUT design requires the colorist to decouple the look from the display transform, and store them as "log2log" versions. By excluding the technical display transform, the look can be used throughout the entire production pipeline, from set to any display target available and deliverable that is asked for including Rec709, P3 or PQ for HDR. Additionally, The log2log version of your looks enables colorists to mix and match looks, as demonstrated by Florian Utsi Martin from ARRI in the video below. Even though there are no limits in creativity of look creation, most colorists prefer to bake soft curves and suddle color manipulations into their Show LUTs. Just enough to bring the scene into the desired tone and feel, and leave the final touches for the color grading session. Test charts When the final look is created and testet on various shots, it’s good practice to run it through a couple of ramps to detect if there are any issues with quantization and clamping. The LUT Assistant have a lightness ramp and a saturation ramp that cycles through different brightness and saturation levels of different hues, and will let you know if anything strange is going on. Single LUT and CDL adjustments To keep the color pipeline in production clean and simple, the best way is to create one, and not multiple Show LUTs. It could be tempting to create multiple Show LUTs to cover interiors, exteriors, dark situations, different cameras and lenses as one does not always fit all. It definitely happens that multiple ones are created for the same production - especially tungsten and daylight versions, but it could easily break the consistency and create confusion when a large number of vendors are involved. One solution to adjust for these variations is to pre-grade the dailies that needs some extra attention on set, while watching the look through the Show LUT. These pre-grades can be saved as CDL files. It will disregard the need of multiple Show LUTs and help bring the various scenes more in line with the creative vision of the project prior to the color grading session. The CDL files are often imported and used as reference in the final color grading session, but normally thrown away and not a part of the final grade. LUT limitations It’s important to understand that there are some technical limitations in 3D LUT generation. In general, most spatial and textural grading tools can not be incorporated properly into a LUT. This includes any form of shapes, blurs, denoise effects, grain and adjustments that modifies the texture of the image. Make sure you don't use any spatial operators. I'm sure that key you did with a lot of blur and erosion looks fantastic. At least it did until you baked it into a LUT - John Daro In addition to the general 3D LUT limitations, DaVinci Resolve ignores nodes with DCTL Plugins applied when generating LUTs. This is strange and frustrating to many colorists, and something that hopefully will be fixed by BlackMagic Design in the near future. In the meantime, there is a quick workaround for that which is explained in this post. LUT generation Before exporting the Show LUT, we recommend entering a description in the meta data field. In this specific case it would for example be useful to know that the LUT is designed for a log-to-log workflow for the Alexa 35 camera. For inspiration on how to meta tag your LUTs, drag and drop one of your existing ones into for example this HTML editor to see what other creators have included. When it comes to the export, there are some different practices depending on which camera the Show LUT is designed for. The majority of cameras can import a 33-point mesh size 3D LUT in Cube format, while others such as the Alexa 35 camera are capable of reading 65-point data with higher precision. Having access to the 65 point file is beneficial during the color grading session even though the 33-point mesh size file is the one being used in camera. The other factor to consider when exporting the LUT is whether to incorporate the display transform or not. While most cameras require the display transform to be included, newer cameras like the Alexa 35 no longer offer this option. Instead, the colorist must disable the transform and export a cube file containing only the look, with the transform being managed by the camera. Alexa 35 even requires the 3D LUT to be translated to an afl4-file with their own free software, ARRI Reference Tool. Lastly, always re-import the LUT and apply it to your test images to verify that the everything works as intended.
-
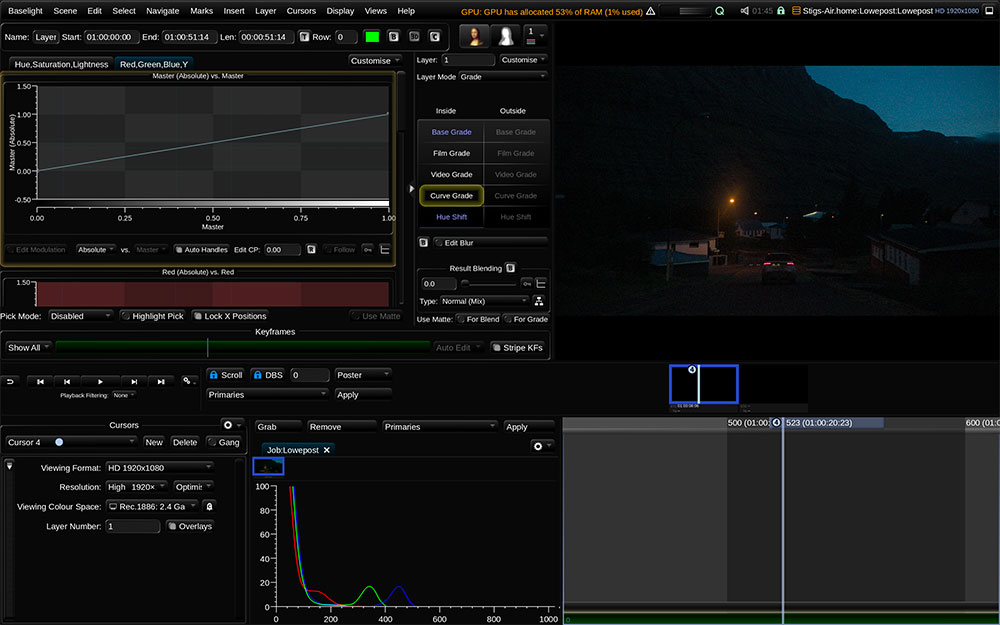
DaVinci Resolve is the most known professional color grading system, but Baselight by Filmlight is a strong premium competitor in the high-end part of the industry. Many of the largest post-facilities in the world have Baselight installed and it’s the top choice for many renowed colorists. In this post we’ll look at why you might want to switch from DaVinci Resolve to Baselight, how to get trained and the most affordable way to get access to it. All-in-on vs superior color science One very important difference between the systems is that DaVinci Resolve is built to handle the entire post production process in an all-in-one software solution. It combines conform, editing, color grading, visual effects and audio production in one application. Baselight on the other hand focuses primarily on color grading, something they do extremely well. Filmlight’s engineers and color scientists know the ins-and outs of color science, and their knowledge of all-things color is known to be second to none. Some colorists say they can get to a better result faster with Baselight, and that it allows for finer control over the color. It's the samurai, not the sword - John Daro, Warner Bros You’ll find that both applications have many of the same tools, but non-identical implementation. For example, both have lift, gamma and gain controls but they behave differently and return different results. The same applies for curves, hue-shift controls and several of the most standard color grading tools. In addition, each application have a set of their own unique tools. The Filmlight engineers have for example implemented BaseGrade and Texture Equalizer that has become imperative to many users. That said, Baselight is very complex and this level of support might not be necessary for facilities running DaVinci Resolve. There’s an argument to be made that DaVinci Resolve is so easy to use that there will not be a need for external support, and there are almost unlimited resources and experienced users available online that you can lean on if running into an issue. Is it worth learning Baselight? The Baselight color science is truly incredible and many new users get the “wow effect” because of how different it feels compared to working inside of DaVinci Resolve. It’s definitely a new experience. Furthermore, learning Baselight can lead to a a deeper understanding of the art and craft of color grading, and trigger some excitement to learn more. It’s a different way of thinking and can help see your current workflow and methods in a new light. Cost is always an object, and definitely one of the reasons you don’t see Baselights everywhere. For a freelancer or boutique owner, it will be difficult to justify the large investment when you can get a high-performance DaVinci Resolve system for a fraction of the price. However, the learning version is free and if you’re already set up with Avid Media Composer you can get the Baselight Edition for an affordable price and choose to upgrade at a later time if you find that it's for you. Lowepost
-
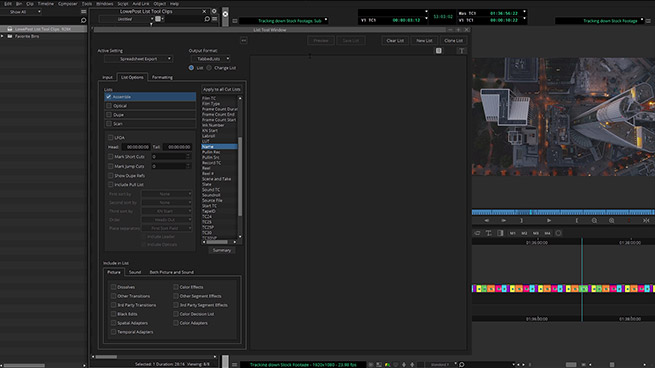
Many film productions out there rely heavily on stock footage, stock music and stock sound effects. It’s all fun and games when adding these elements to the timeline, but once the time comes to track down their names, how many times they are used, where they fall on the timeline and durations, that's where things can come to a grinding halt. A job that should be as simple as tracking down a few pieces of information, can turn into an all day (or multiple day) task. What if there was an easier way to quickly track down all this information, and have it presented to you in a nice, organized fashion? Well, there is. Tucked away inside of the Avid Media Composers List Tool, is a quick and powerful way to create spreadsheets with all the relevant information that you need, that is guaranteed to have you going back to it over and over again. Enjoy the video! By Kevin P. McAuliffe
-
There are some limitations with LUT generation in DaVinci Resolve. One is the missing ability to add good enough metadata to the LUT, and that’s important because it’s used to inform the user about things like what color space it requires, the display it’s designed for, copyrights and size. Another limitation is that the LUT generation simply ignores some of your grades if you have applied unsupported effects or DCTLs to your node structure. In the following example we’ll explain how to generate a LUT with a combination of supported and unsupported effects and plugins, in less than a minute. 1. Include all grades Go to the shot with the grade you want to export, and confirm that all the nodes you want to include are enabled. Then, grab a still of the finished grade. 2. Hald CLUT (Hald Color Look-up table) Download the Hald CLUT image from the free Look Development Starter Kit by Ravengrade and import it to your timeline. A Hald is basically a 2D pattern that can store the same color values as a 3D LUT, and with the same high precision. Be aware that not all Hald images available are designed good enough to store high-precision values, it depends on the size and the bit depth. The higher size and bit depth, the more precision. The recommended size is 3x64 and the bit depth should be 16 bit. To check the bit depth of your Hald image inside of Resolve, click the clip in the editing section and the information will be available inside of the metadata clip details. The Hald image in the Look Development Starter Kit fullfills the requirements for high-end image based workflows, so you don't need to look any further. 3. Resolution Change the resolution of your timeline to match the resolution of the Hald image. In this example the Hald image is 3584x3584, so the timeline resolution should be set accordingly. Note that if only one of the pixels are set incorrectly, the grade will not transfer correctly so this is a critical step. 4. Copy the grade Now it's time to copy the grade from the still you have saved in the first step, and apply it to the Hald image. 5. Export TIFF In the delivery tab, set the in and out points to mark one frame of the Hald image, and render it out as TIFF RGB 16 bits. That's an uncompressed format that contains all the color information you need. 6. Import to LUT Generator Now you'll have to use an external LUT Generator. There are some free ones available such as the IWLTBAP desktop LUT Generator and the LutCreatorJS online LUT Generator. Note that LutCreatorJS reads PNG files only so you’ll have to convert your TIFFs before importing them. We recommend to use Lattice as it’s a complete package that includes visualization tools that can help you evaluate your LUTs and other features that you might find useful. Open Lattice and click “Open LUT” to import the TIFF that you rendered out from DaVinci Resolve. If you are using one of the free LUT generators, follow the steps on their sites. Confirm that the LUT details are correct and that the grades are transferring correctly. 7. Metadata and LUT export Go to the Metadata section on the right side and insert a description. Best practice is to at least insert the input and output color space, and the display it’s designed for. If you want to see what metadata other creators have included, simply drag and drop one of your LUTs into this online HTML editor. Note that you don’t need a LUT generator to insert descriptions, it can be done in any text editor of choice after the LUT is created. Finally, go to “Save LUT as” on the File menu and export the LUT as a .cube-file. That’s it, but it can be a good idea to import the newly created LUT back into Resolve to verify that everything works as expected. By Lowepost
