Jump to content
Lowepost
    Tracking Complex Surfaces in Nuke 13 & Mocha

Tracking Complex Surfaces in Nuke 13 & Mocha

xap3.137.181.194


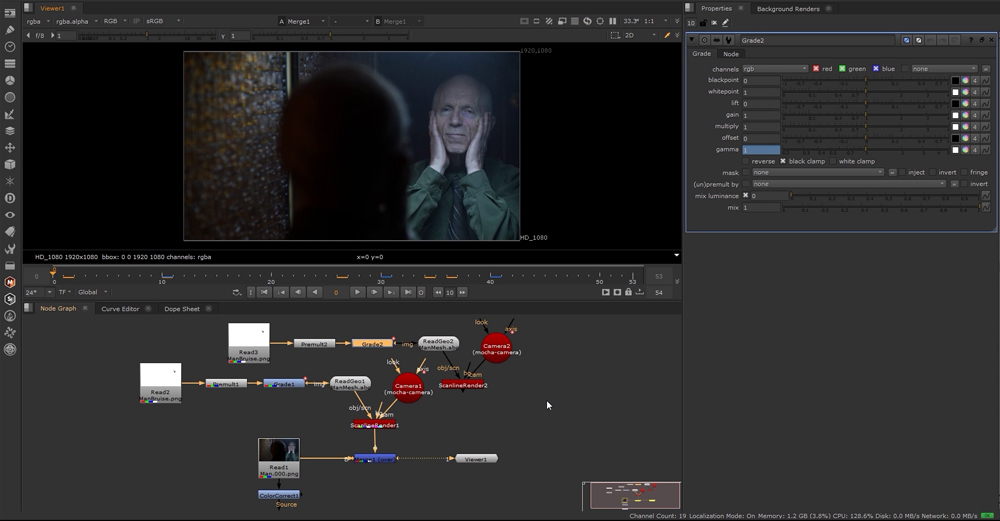
This course is about motion tracking complex surfaces in Nuke 13 and Mocha Pro, and taught by master trainer Lee Lanier. 

You will learn how to add digital make-up, tattoos or scars to organic surfaces such as rippling skin, reflections to curved surfaces, and elements to complex surfaces such as flapping flags or undulating clothes.

Nuke and Mocha Pro is the perfect combination for all compositing tasks and Lee will teach you the techniques you need to be confident to solve the most complex shots. The course is easy to follow and designed for both beginners and professionals.

About the instructor

Lee Lanier has created visual effects on numerous features films for Walt Disney Studios and PDI/DreamWorks. Lee is a world-renowned expert in the video effects field, and has written several popular high-end software books, and taught at the Gnomon School of Visual Effects in Hollywood.

Who is this course designed for?

  • Compositors
  • Finishing Artists
  • NUKE Users
  • After Effects Users
  • Mocha Pro Users

Lessons overview

  • 01: Introduction
  • 02: Shot A : Transform tracking
  • 03: Shot A : Transform tracking adjusting
  • 04: Shot A : Preparing the reflection
  • 05: Shot A : Applying the tracking data
  • 06: Shot A : Disorting the reflection
  • 07: Shot A : Adding tracking to a mask
  • 08: Shot B : Nuke planar tracking
  • 09: Shot B : Applying the planar tracking data
  • 10: Shot B : Integrating the text
  • 11: Shot C : Corner pin tracking
  • 12: Shot C : Adding additional track points
  • 13: Shot C : Creating a small matte painting
  • 14: Shot C : Applying the corner pin data
  • 15: Shot C : Using motion blur and grain
  • 16: Shot D : Planar tracking with mocha pro plugin
  • 17: Shot D : Adjusting the planar track
  • 18: Shot D : Mesh tracking in mocha
  • 19: Shot D : Exporting and importing the mesh
  • 20: Shot D : Finishing the 3D network
  • 21: Shot D : Creating additional matte paintings
  • 22: Shot D : Adding the first matte painting
  • 23: Shot D : Copying the 3D network
  • 24: Shot E : Additional mesh tracking
  • 25: Shot E : Adding different textures to the mesh


Become a premium member and get instant access to all the courses and content on Lowepost.


Become a Premium Member


  • Like 2
  • Thanks 1

User Feedback

Recommended Comments

If you want to adjust tracker, you don't need to set keyframes on first frame if you already successfully tracked part of shot. Find the last good frame, delete forward (or backward if doing reverse) track that is off, adjust pattern or search region and track on from that point. There are buttons in tracker ui for both deleting part of track forward or backward from current frame and for removing keyframes. Tracker falls off for two reasons only: searchable pattern is outside of search region or it doesn't find match below error threshold (which is in the end the reason in first case too). If you delete forward track that is off and step to next frame, you see how far the pattern jumps. This gives an idea of necessary search region size. Capturing new pattern is necessary when match error goes above set threshold, usually due to pattern change from perspective etc or due to lighting changes. Changing pattern on first frame and retracking from start when tracker slips at frame 200 or something is kind of useless, because what you actually want is to capture is new pattern, not just different crop of old one.
 
By connecting something to A2 input of Merge node it does not "know to use it for alpha". It is used as just that, an A2 input, which is producing the cascade of A2 over A1 over B. Only because mix is set to low value it kind of works. Drive mix to 1.0 and it is pretty clear it does not mask and A2 input is not used as masking alpha. There is a mask input on most nodes to apply actual mask.
 
For moving the center of transform there is a very easy way: hold Ctrl and drag it with left mouse button where you want it.
 
PS. Right and up node layout is really strange to watch, no-one does that in Nuke...
Edited by Hendrik Proosa
Link to comment
Share on other sites

10 hours ago, Hendrik Proosa said:
If you want to adjust tracker, you don't need to set keyframes on first frame if you already successfully tracked part of shot. Find the last good frame, delete forward (or backward if doing reverse) track that is off, adjust pattern or search region and track on from that point. There are buttons in tracker ui for both deleting part of track forward or backward from current frame and for removing keyframes. Tracker falls off for two reasons only: searchable pattern is outside of search region or it doesn't find match below error threshold (which is in the end the reason in first case too). If you delete forward track that is off and step to next frame, you see how far the pattern jumps. This gives an idea of necessary search region size. Capturing new pattern is necessary when match error goes above set threshold, usually due to pattern change from perspective etc or due to lighting changes. Changing pattern on first frame and retracking from start when tracker slips at frame 200 or something is kind of useless, because what you actually want is to capture is new pattern, not just different crop of old one.

Thanks for your input.

I'll admit I can be unorthodox in my technique and a little obtuse with my explanations, but I firmly believe there are multiple approaches to every VFX problem. I would encourage all VFX artists to stay flexible, seek out information from multiple sources, and follow the standards set by the particular studio, project, or supervisor you working for.

  • Like 3
Link to comment
Share on other sites

10 hours ago, Hendrik Proosa said:

If you want to adjust tracker, you don't need to set keyframes on first frame if you already successfully tracked part of shot...

You don't have to, but in many cases you simply do re-track because it's faster or you don't care to look for the last good frame. Absolutely no wrong about doing that.

  • Like 1
Link to comment
Share on other sites

Hi Lee,

Sure, I just wanted to provide some hopefully constructive feedback, maybe someone can pick up a useful nugget of information :) But I’d still suggest to use common Nuke node layout of down and right instead of right and up, makes comps much easier to read for any Nuke artist.

Link to comment
Share on other sites

57 minutes ago, Hendrik Proosa said:

Hi Lee,

Sure, I just wanted to provide some hopefully constructive feedback, maybe someone can pick up a useful nugget of information :) But I’d still suggest to use common Nuke node layout of down and right instead of right and up, makes comps much easier to read for any Nuke artist.

My node network directionality is an ingrained habit built over many years. I will keep the suggestion in mind for the next course, or at least mention it as a common approach.

  • Like 3
Link to comment
Share on other sites

5 hours ago, rakeshr said:

I don't know why but im not able to download the project files for this course.

The button seems to be dead. I will let the website manager know.

  • Thanks 1
Link to comment
Share on other sites

5 hours ago, rakeshr said:

I don't know why but im not able to download the project files for this course.

Thanks for letting us know, it's fixed now 🙂

  • Thanks 1
Link to comment
Share on other sites


Join the conversation

You can post now and register later. If you have an account, sign in now to post with your account.
Note: Your post will require moderator approval before it will be visible.

Guest
Add a comment...

×   Pasted as rich text.   Paste as plain text instead

  Only 75 emoji are allowed.

×   Your link has been automatically embedded.   Display as a link instead

×   Your previous content has been restored.   Clear editor

×   You cannot paste images directly. Upload or insert images from URL.

×
×
  • Create New...